After leaving the Adirondacks and moving to Delaware, I miss forays out on the water in my guideboat. I am no longer within reasonable reach of a place to enjoy rowing my newest guideboat. With some sadness I will have to part with the “work of art” that Stew and I spent nearly two years creating.
I consulted with someone knowledgeable about the worth of a traditionally built guideboat. They advised me to price this boat between $20,000 to $30,000. After pondering his advice I decided to set a price of $18,000. The reason I chose that sum is to encourage someone who has fallen love with the Adirondack guideboat to be able to own it. Having put nearly $10,000 of materials and untold hours of work in creating this boat I think this is reasonable. I would love to have this boat go to someone who would truly treasure it.
A description of the boat follows:
Adirondack Guideboat for Sale
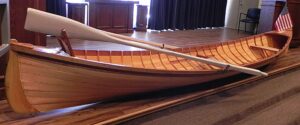
The Adirondack guideboat is widely acclaimed as being the most beautiful small craft in the world. It grew from humble beginnings as a guide’s work boat to a much admired pleasure craft of the wealthy Robber Barons. It is often described as a “work of art” by those who see it for the first time.
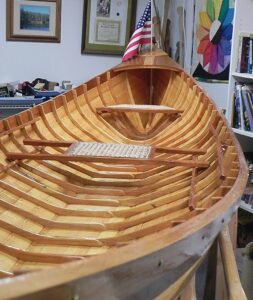
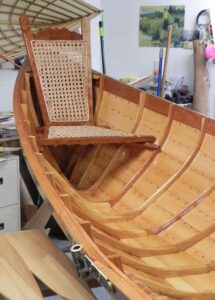
A recently completed traditionally built Adirondack guideboat is for sale. The boat is an exact replica of the Queen Anne, a boat revered by the Pyruyn family, owners of Great Camp Santanoni. The Queen Anne was built around 1895 by Caleb Chase who is renowned for his extraordinary craftsmanship.
This boat is built just as Chase would have done it. The ribs and stems are made of hackmatack roots. The thin planking is from white pine harvested on the shores of Lake Superior. It is secured to the ribs with 500 brass screws and made water-tight by 4000 clinched copper tacks placed along the planking seams. The boat is protected by at least four coats of marine varnish.
This boat is fast and easy to row. One of its sisters captured first place in the Adirondack Annual 90 miler guideboat-canoe race.
The boat comes with a pair on soft maple oars.
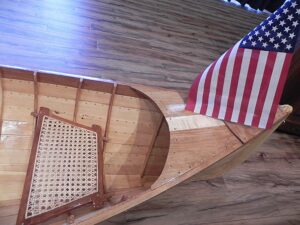
The asking price is $18,000. I am looking for someone who will treasure its heritage and take joy in every day out on the water in it.
Boat dimensions
LOA-15 feet, 6 inches
Beam-38 inches
Weight- approx. 70 lbs.
Transport to points along eastern seaboard can be arranged.
If interested contact me at gordonfisher1@verizon.com.
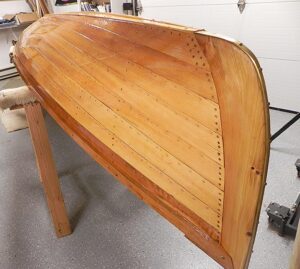
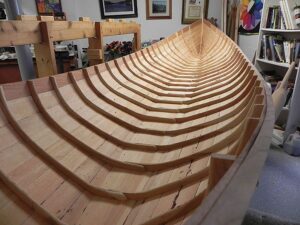
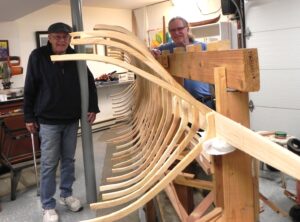
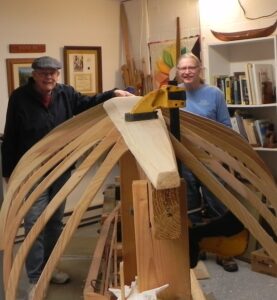
The day the hull comes off of the strongback is one of mixed emotions. It is exhilarating to see the hull right side up for the first time. All the months of work are now realized. I agree with some that regard a guideboat as a work of art. This day, to me, is also a sad day. All the work of many months is nearly over. What will I do to fill the void, the challenge of building such a beautiful object? Build another guideboat? At age 87 do I have what it takes? I will ponder that question and hope to come up with the right answer.
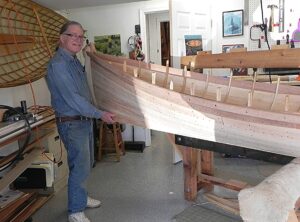
Stew proudly holds the new born boat.
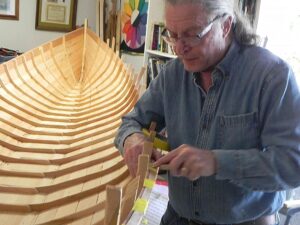
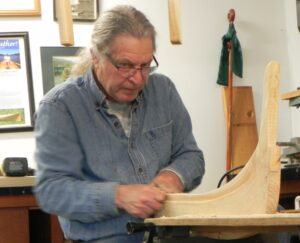
There is still work to be done. First, the stub ends of the ribs must be cut off. I use a Japanese “pull” saw to do that.
Here is Stew cutting off the stubs.
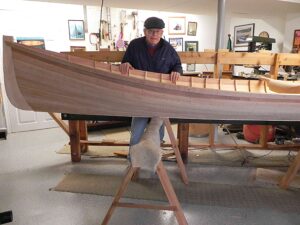
Here I am taking bows.
Gordon taking bows.
Here is the hull looking lengthwise.
View of hull.
After careful inspection things look good. The excess bedding compound must be removed and any tacks that weren’t clinched taken care of.
Next, the rows of tacks along the inner hull lap are put in. After a plot hole is drilled the tacks are “stuck” in the holes and then clinched. The old timers employed their wives or their kids to stick tacks. The kids were paid five cents a round for their labor. Since there are eight rounds of planking they made the whopping sum of forty cents.
The attachment of the gunwales is the last step before taking the hull off the strong back. The gunwales are integral to the hull for several reasons. First, they give added support by tying the whole hull together. Should the bow of the boat collide with with a pier, for example, that force will be safely spread away from the bow and along the gunwales, thus avoiding serious damage. The same will happen should a blow to the midships occur.
The second function of the gunwales is to offer a sturdy support for the oar locks. Howard Seaman’s racing guideboat, now on display in the Adirondack Museum, shows the strain that his oarlocks had to bear when he was racing. His oarlocks were held by bolts that ran through the gunwales and hull planking where they were securely held with washers and nuts.
The gunwale are useful in another way; they help eliminate the use of thwarts. Thwarts are cross bracing used with canoes. Canoes use steam bent ribs which are not as strong as the sawn ribs in a guideboat. Doing away with thwarts by using sawn ribs opens up the inside of the boat and makes it much easier to stow gear.
My gunwales are made of quarter sawn cherry. I learned the secret of using quarter sawn stock after wrestling with flat sawn material on my first guideboat. It is nearly impossible to get flat sawn stock to conform to the shear curve. Sometime way back someone clued me in to using quarter sawn for the gunwales. I have been forever grateful for that advice.
Why is quarter sawn stock preferred for making the gunwale? Grain in wood is really a composite material. A softer layer of the grain is laid down during the spring and summer months. Towards the end of summer a harder, denser layer forms next to the softer band. This forms what woodworkers call grain.
With flat sawn stock the grain runs roughly parallel to the top and bottom of a plank. Just the opposite is the case with quarter sawn stock where the grain runs perpendicular to the top and bottom of the plank.
When you are installing the gunwale the stock must bend upwards along the shear line. Flat sawn stock totally resists this bend. Even with steaming the gunwale it is extremely difficult to fit the gunwale to the shear curve. I suppose it is the hard layer of the grain that resists that bend. It just doesn’t want to move sideways.
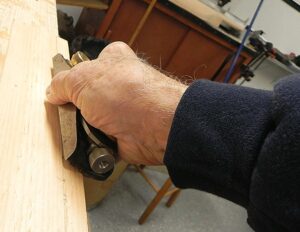
On the other hand quarter sawn stock is much easier to bend along the shear line. I’m not saying it still isn’t a struggle to make it fit, because it is. But with some patience you can work your way along the shear line fastening the gunwale to each rib station. I use #6 X 3/4″ long round head screws to fasten the gunwale.
The use of quarter sawn material is no panacea, it is still difficult to install the gunwales. The gunwale stock is 9/16″ thick and 1 1/4″ thick. To make it easier to install, I ran a rabbet down the center of the hull side of the gunwale. It is the width of my table saw blade and 1/8″ deep. The photo below shows the rabbet. The rabbet has a minimal effect on the strength of the gunwale.
Rabbet cut in gunwale
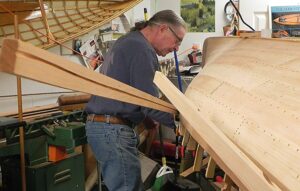
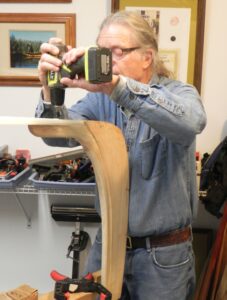
Here Stew is working along patiently fastening the gunwale.
Fastening gunwale
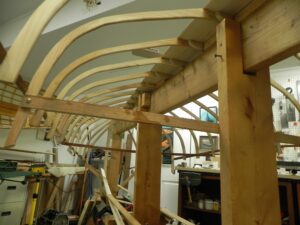
With the gunwale installed we can begin in earnest to finish the inside of the hull. that’s next.
I have run out of my stash of quarter sawn white pine planking stock. Since I can’t find any more white pine locally, I need to switch to another material for my final round of planking. Spanish cedar is a very handsome wood that I have used to build my previous boats. Besides being beautiful, Spanish cedar is light weight and rot resistant. However, since only flat sawn Spanish cedar is available locally, I will have to deal with its shortcomings. That drawback means that it is very hard to make it conform to the hull.
In an attempt to make the Spanish cedar conform I tried my old standby flash molding. To do so you spray water on the plank, wrap it in aluminum foil, and place a thermal blanket on top. This sandwich is then clamped into position on the hull. While it is clamped in place, it is heated to around 300 degrees and held there for a few minutes. If all goes well the plank should take the shape of the hull imparted by each rib. No matter how I tried the plank would not take the shape of the rib.
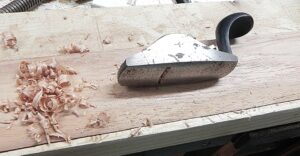
So the only option was to use the old timers method called “backing out”. They use a plane with a convex sole to conform the plank to the curve of the rib. I have often been awed by those who are able to back out a plank because it takes extraordinary hand-eye coordination. Since I have no choice, I will give it whirl.
I have a lie-Neilson convex plane and a scoop shaped chisel to use for backing out. Here they are below.
Lie-Neilson convex plane.
Scoop chisel
I finished off the convex surface of the plank with a scraper with a rounded face. This seems to work quite well. It enable me to hang the last plank.
Rounded scraper
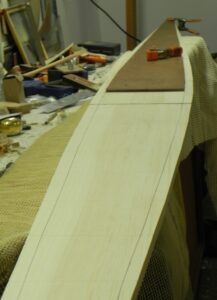
Here is the last plank. The tan colored shear plank offers a nice contrast to the white pine planking.
After what seems a very long time, Stew and I hung the next to last strake. Planking is an arduous task but despite many obstacles we have almost finished it. And we didn’t need the “crying chair”. The crying chair comes from a conversation I had with my friend Bunny Austin. Bunny was a remarkable Adirondacker. He comes from a family of guideboat builders. His lineage begins with his grandfather Billy who came from Vermont in the mid-1800’s and started building guideboats on the shores of Long Lake. Bunny’s father, Merlie continued the craft. Bunny had little choice but to continue the family tradition.
Well, his nephew, Kevin, also a Long Laker, felt compelled to build guideboats. One day Bunny got a distress call from Kevin. “Uncle Bunny I’m in a terrible mess. Overnight my newly laid plank split right down the middle.” ‘Well, Son, pull up your crying chair and try to think of other things” Bunny replied.
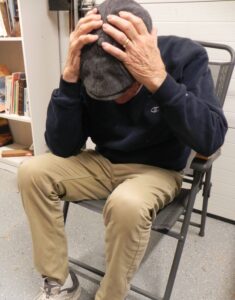
Here I am in my crying chair. So far, during this build I haven’t needed it. I hope my luck continues.
The crying chair
This time around I’m using quarter sawn white pine for the planking. Since the grain runs perpendicular to the surface of the plank, it will bend more easily around the curves in the ribs compared to flat sawn stock. I found quarter sawn stock much easier to work with compared to flat sawn stock.
While struggling to lay out a new plank, I discovered that there was an easier way to lay them out compared to spiling. To do so, lay the new stock over the previously laid plank. Overlap it by at least 5/8″. Reach under the overlapped stock and, with a pencil, trace the forward edge of the previous plank onto the new stock. With a batten connect the traced lines to obtain a smooth curve. Cut along the line and trim it with your block plane. We will now call this the nascent plank.
Lay the nascent plank back on the hull. Locate it at least 4″ below the last plank and make sure it is aligned with the ribs. Now take a compass and mark off the distance from the top of the bevel on the previous plank and the next tick mark. Mark this distance on the nascent plank. Do this for each rib station. Connect the “dots” with a batten and cut away the waste. The photo below shows the procedure.
Marking off a new plank using a compass.
I have run out of quarter sawn white pine planking stock. I decided to go to Spanish cedar for the last plank. It is a beautiful wood with grain much like mahogany (it is a relative of mahogany but much lighter). The problem I will have to overcome is that it is flat sawn. That means it will resist bending around the curve of the hull. My next post will be devoted to solving how to fit a flat sawn plank on a curved hull.
Before planking can begin there are many small tasks to complete.. These will ensure that, at this early stage, there will be no unpleasant surprises down the road.
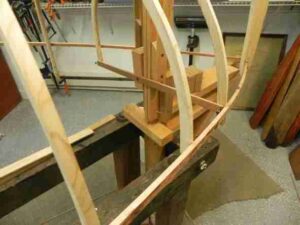
We ended the last post with the nascent hull upside down on the strongback. Before going further, the ribs must be stabilized, or tied down. This is done using what the old timers called a spline. I use a spline made of a quarter inch square batten long enough to run the length of the hull. Since it will run along the shear line I mark that off first. I attach the spline to a stem and proceed down the line attaching each rib to it. Except for the ribs nearest the stems the ribs should be separated by the same distance as they are at the bottom board. Use a level to make the ribs nearest the stems plumb. The photo below shows the spline in place.
The photo also shows some of the cross-bracing that makes a rigid, secure hull. Below is another view of the bracing.
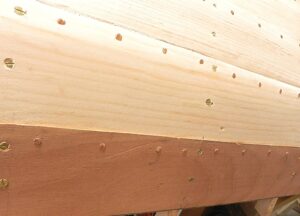
In this rendition of a guideboat there are eight rounds of planking, a garboard plank, six others and a shear plank. It really helps laying out the planks if you mark off where the lower edge of each plank falls at each rib station. This is done using a series of “tick tapes”. There is a tape for each rib station. The photo below shows a group of them.
Tick Tapes
The garboard plank is the easiest to install. That is because you only have to worry about lining up the forward edge of the plank. To do the lining off, clamp edge of the plank stock an inch or so above the first set of tick marks. Make sure the planking stock is wide enough to extend at least 2″ above the bottom board. Now take a compass and, for each rib station, transfer the first tick mark at each rib station to a point on the planking stock. This will give you a series tiny arcs, that when connected, provide the shape of the leading edge of the garboard plank. Use a batten to connect the arcs with a pencil line. Cut along the line and clamp the new plank onto the hull. If necessary, use a block plane to trim the edge to its proper shape.
You will have an excess of plank above the bottom board. This excess has to be removed. The fastest way is to use a chisel. Be careful to go with the grain or you will have split running into the new plank. If you are reluctant to use a chisel use a block plane. This operation is best done after the plank has been installed.
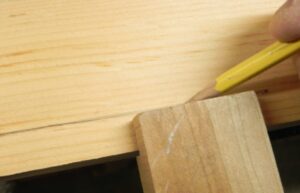
You will need to use two separate lengths of plank stock to span the length of the hull. These are joined together using a joint called a scarf. It is made by overlapping the two planks. Before we get to the scarf we need to apply a feather edge to the leading edge of each raw plank. If you are using 1/4″ thick planking the bevel will be 5/8″wide. I use a simple marking gage with a 5/8″ wide offset in it. I slide this along the plank while holding a pencil tight to the edge as shown below.
Lining off the bevel
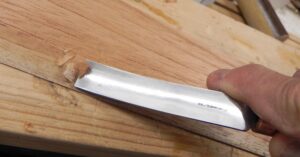
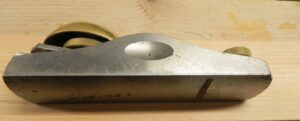
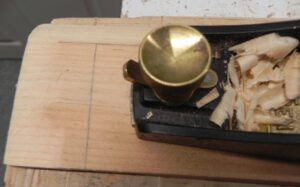
Now using a low angle block plane, I cut the lap. I use a Lie-Neilson low angle block plane. It is a pleasure to use. It is very simple to adjust the blade depth and it stays sharp seemingly forever. Here it is.
Lie-Neilson low angle block plane
Cutting the lap is not easy and takes some practice. You will get plenty of practice while building this boat since there are over 200 yards of lap to be cut. The main difficulty in applying the lap is to keep it from becoming rounded. I hold the plane with my arm straight out in front of me. I “stiff arm” it. That seems to help prevent the plane from “rocking” sideways and causing it to round the bevel.
Planing a lap.
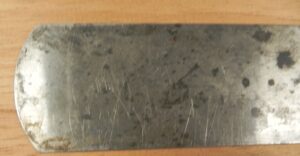
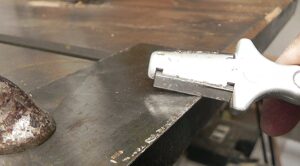
Then I finish the lap using a cabinet scraper. This simple tool is a godsend. It is simply a thin piece of carbon steel about the size of an index card. You apply a burr to the edges using a special sharpening tool. I use one made of tungsten carbide. It is shown below.
Tungsten carbide scraper sharpener
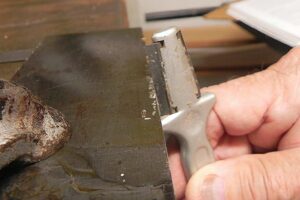
To sharpen the scraper, first grind or sand off the edges to be sharpened. Then clamp the scraper down flat on a stable surface. You can apply some bees wax or motor oil to it to help sharpen it. Now take the sharpening tool and run it several times across the flat surface.
First step in sharpening a cabinet scraper.
This will produce a burr” along the edge of the scraper. Now you want to turn the burr 90 degrees so that it will act like a tiny plane.
Turning the “burr” 90 degrees to produce a cutting surface.
It is not possible to use one plank to span the entire hull. You will need to connect two planks together using an overlap, or scarf joint. Before you can do the scarp joint you need to fit the “hood ends” of each of the two planks into the rabbets cut into the stems. The photo below shows a plank hood end fastened to the stems.
Hood end of the garboard plank fastened to the stem.
Applying the scarf is done once the lap is cut into the new planking and the hood end is fitted. For planking that is 1/4″ thick, I use a scarf that is one and quarter inch wide. Here it is lined off with the block plane ready to go.
Lining off the scarf.
The rules of a scarf is that it should fall on a rib. That means one of the scarfs on a plank should end in the middle of a rib. So the feather edge of one of the scarf joints should fall right on the center of a rib. The scarf on the mating plank must begin at the center of the rib and extend beyond it by one and a quarter inches. If you are not careful and don’t allow for this additional one and a quarter inches in laying out the plank you will have a plank hanging in free space.
To cut the scarf use a plane or chisel to remove most of the waste. Follow up with the long board sander.
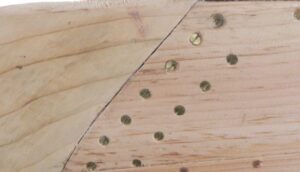
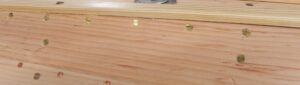
So now the garboard plank is ready for installation. Before attaching the plank, lay a bead of Sikaflex 291 Lot bedding compound on all surfaces that will be covered by the new planking. Now attach the planking using #4 X 5/8 brass screws located on each rib 7/8″ down from the edge of the bottom board. Apply additional screws every 1 1/2″ just 3/16″below the bottom board. See the photo below.
Location of fasteners for attaching the garboard plank.
Installation of the garboard plank is a warm up for the work ahead. The garboard has only one edge to be concerned about. From now on fitting a new plank to the previous one will cause much head scratching.
In an earlier blog I told how I found my way back to building yet another guideboat. This time around I would use the same materials that the old master builders used. There was one exception. I would use hackmatack roots for the ribs and stems. The old timers would have used red spruce which is no longer available. But this substitution should make no difference.
Much to my surprise and delight I found someone who was eager to join the enterprise of building a guideboat. He is my brother -in-law Stew. Stew is an extremely creative soul. He has great nostalgia for things of the past. He loves old cars and has restored several. He collects things from past years that seem, to others, as outlandish. They include a wooden telephone booth, juke boxes(3), and an Atlantic City wheeled boardwalk stroller.
As I have gone along with this build I have learned new things about building this beautiful boat. They have come to me quite unexpectedly,
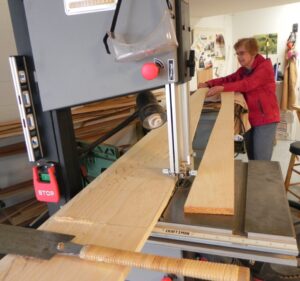
So let’s get started. We’ll need to start assembling the various critical parts of a guideboat. We will start with the bottom board. I was fortunate to get enough grade A eastern white pine stock wide enough for making the bottom board. Since it was too short to make the whole board, I would have to scarf it. I’ve done that before so it’s not a problem. Using a template I laid out the board on my new stock. Then off to the bandsaw with my able assistant, my wife Fran. Here we are at the bandsaw.
Fran and cut one end of the bottom board.
Next the midship ends of the board are beveled to make the scarf.
Setting up the prepared stock for making the scarf.
I have put the two previously sawn planks on top of one another and offset them by the width of the scarf (a rule of thumb for making a scarf is to make its width six times the thickness of the stock). By setting it up this way I can plane the two planks at once. If I do it right the two sections should fit nicely together. (PS Be sure to allow the thickness of the scarf in laying out the length of the bottom board. If you don’t you will come up short)
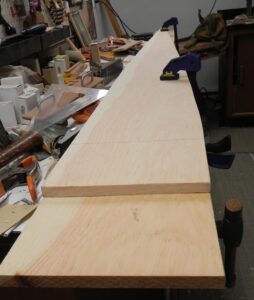
I used recorcinal glue to bond the two sections. In order for the planking to have a smooth transition from the bottom board to the ribs the bottom board must have a “rolling ” bevel. I use a template to trace the upper edge of the bottom board.
You can do the same thing by clamping a small, straight piece of wood to the foot end of a rib. Extend it a few inches from the foot end. Now place the rib with the clamped jig up against the bottom board at a rib station. It should be snug against the underside of the board. There will be a gap where the rib extension does not meet the bottom board. Measure that gap and mark it on the upside of the board. Do that for each rib station. Connect these “dots” with a batten. This line delineates the waste that must be removed to produce a smooth transition between the bottom board and the rib.
Template to layout the upper edge of the bottom board.
Now we can star putting the pieces together. The bottom board is slung on a hanger on each end of the strong back. To have the bottom board hung vertically makes it easy to attach the ribs.
Bottom board ready to accept ribs.
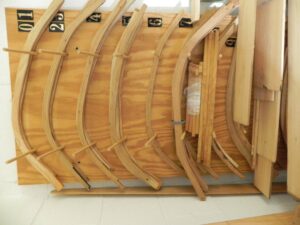
Now the ribs are attached. Here they are on a rack ready to hang. The rib patterns are in the lead on the rack. I find that storing the ribs on a rack like this makes the whole assembly process easier.
Ribs on rack ready to be attached to the bottom board.
Here, the ribs have been attached to the bottom board.
Ribs attached to the bottom board.
Now the assembly is turned upside down and mounted on the strong back.
Rib/bottom board assembly attached to strong back,
As you can see from the photos above the strong back is fitted with a special beam. It has slots to give clearance for the ribs. It is also bent down slightly at each end to apply “rocker” to the hull. This slight curve at each end of the hull makes the boat more maneuverable.
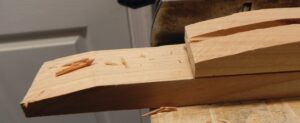
Next comes the stems, Before they are installed a rabbet must be hewn to enable the plank (hood) ends to fit flush into the the stem. For the most part it meets the stem at a low angle and must be as deep as the plank thickness.
Here is Stew creating the rabbet on one of the the stems. He uses a chisel to do the rough cutting and cabinet scraper to finish up. A notch is cut in the aft end of the stem to receive the bottom board.
Stew cutting the rabbet on the stem.
The stems are now ready to be attached to the bottom board.
Stew attaches a stem to the bottom board.
The next steps are important to a proper build. The bottom board must be level and the stems perpendicular to it. Place a carpenter’s level crosswise on the bottom board at the midships. If it is necessary to level the bottom board put shims under the strong back legs. Now put the level up against each of the stems. You may have to use shims to make the stems perpendicular to the bottom board. As the old timers put it we are now level and plumb.
In the next post we will prepare the nascent hull for planking.
I learned the other day that a true Adirondack mountain man, Bunny Austin, had passed on. I treasured my relationship with Bunny although I hadn’t seen him for awhile. He was a gentle, humble, and compassionate man. He always made you feel welcome. He freely shared his knowledge of boat building and Long Lake Town history.
I would often visit him during the summer. We would sit on his porch and chat. His house was high above the lake and had a wonderful view of Mt. Sabattis, East Inlet Mountain and, of course, Long Lake. Bunny told me that when he grew up in the 1930’s and 40’s there were hay fields everywhere. Now, instead of seeing fields from his porch, the forest has taken over. The only field I know of in Long Lake is owned by Tom Bissell. Tom graciously allows the 90 miler canoe race to start from that field on the second day of the race.
Bunny was born into a guideboat building family. His father. Merlie, built them to help support his family. Bunny said that Merlie spent many hours building and could build a guideboat in about 300 hours. Then there was his grandfather Billy who built rowboats around 1870 or so. He dwelled at the north end of Long Lake. I was curious about where Billy came from. I suspected that at least some of the early migrants to the Adirondacks were shipwrights. Bunny said that his grandfather moved from Ferrisburg, Vermont to Long Lake. Hmm, I thought, Vermont is known for dairy cows, the Green Mountains, and maple syrup, not boat building. How wrong I was! I forgot about Lake Champlain. It was the hub of naval activity during the Revolutionary war and the War of 1812. Doubtless, many Vermonters left their homes for the Adirondacks bringing their ship building skills with them.
Bunny’s grandfather must have been one of them. Ferrisburg is located very near the shore of Lake Champlain. This large lake was the site of intense naval activity during the Revolutionary War and the War of 1812. The tall ships engaged in these battles needed the skills of shipwrights of many abilities.
Bunny had a nephew, Keith, who also built guideboats. I knew Keith and had talked with him of our mutual interest in building guideboats. He related an amusing story about an exchange he had with his Uncle Bunny. Keith had run into a real jam while building a boat. He was totally exasperated and called his Uncle Bunny for advice. Bunny told him to pull up his “crying chair” and think about it. How I can relate to the crying chair!
As a young man Bunny enlisted in the Marine Corps and excelled in marksmanship during boot training. In fact he was so proficient at marksmanship that he became an instructor. Later he was only one of two enlisted men in his platoon to be offered pilot training. Bunny told me that he played a crucial role as a pilot during the Cuban missile crisis. He flew photo reconnaissance missions over Cuba to gain invaluable intelligence about the Russia’s intentions. This required him to fly very low over sensitive military installations, a very dangerous mission. His commanding officer was well aware that Bunny might not return from every mission.
Bunny would often take me back into his shop. It was like going back in time to the early 1900’s. It was sort of an old barn filled with impressive power tools. There were always one or two guideboats under construction or being refurbished. I have a vivid memory of rib patterns hanging on the wall. Each set had the name of the builder who used them. It reinforced the idea that guideboat builders would freely share their expertise with other builders. Perhaps that is why guideboats are remarkably similar regardless of who built them. It also reinforced my sense that Adirondackers freely share their knowledge and possessions.
Bunny felt the call to serve as a Pastor and was trained at the United Wesleyan College in Allentown, PA. He then became a Pastor at a Brant Lake Church in the Adirondacks and also in Germany as a Pastor for three years.
Some primal urge took over and I start building yet another guideboat. I fear building boats is in my family tree. With the last name Fisher it is likely that there is a strong family connection with boats and boat building. Then too, my father built a small sailboat that he and my mother raced on the Chesapeake Bay. You have read about my Uncle Don and the Whitehall he built.
This time around I will build a guideboat as closely as I can to how the old master builders did in the late 1800’s. I will use hackmatack roots for the stems and ribs and quarter sawn Eastern white pine for the planking.
How do I source these rather exotic materials? Fortunately I have a friend who can help. Josh and I became close friends in the year 2000. This was the year my wife Fran and I spent in the Adirondacks. I volunteered at the Adirondack Museum in several different capacities. Halley Bond, then the Museum’s curator of the Museum’s small boat collection, decided to initiate a guideboat building living exhibit. A boat builder would construct a guideboat on site before the Museum visitor’s very eyes. Josh had been hired as an intern, having just graduated from the Newport Rhode Island boat building school. So he assumed the role of builder. Since I had built a guideboat, I became a docent. I would answer the visitor’s questions so that Josh could devote his full attention to boat building.
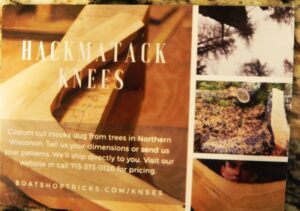
Josh left the Adirondacks after his internship was over and set up shop in northern Wisconsin right near Lake Superior. He knew that there was a need for hackmatack knees for boat building and other uses. There had been a fellow who had a corner on the knee market; Newman, who called his business Newman’s Knees. Tragically he was killed in a logging accident.
Josh found that hackmatack tress were numerous in his area. They thrived in the boggy conditions found there. He met a logger who was harvesting the hackmatack trees but had no interest in the knees. The logger agreed to cut the trees chest high so that the roots were preserved.
Having learned from Newman’s demise, Josh uses a remote controlled power takeoff on his pick-up truck to pull the roots out of the ground. Here is the flyer for his root business.
Flyer for Josh’s Knee Offerings
The flyer says “Custom cut crooks from trees in Northern Wisconsin. Tell us your dimensions or send us your patterns, We’ll ship directly to you. Visit our website or call (715) 373-0126 for pricing.
BOATSHOPTRICKS .COM/KNEES
I took Josh up on his offer. It turns out that he already had a set of my plans. The hull facing surface of the ribs he sent me fit perfectly to my rib patterns. All I had to do was trim the interior facing part of the rib and round it. I used spoke shaves, large and small, and a scraper, to do that.
Shaping inner rib surface
He also sent stems, fore and aft. These needed a little trimming and the rabbet cut in them.
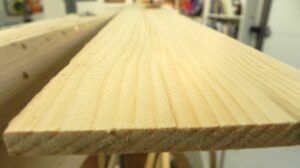
Josh said he could supply me quarter sawn clear eastern white pine 3/8″ thick. It turns out that he knew some very old white pine trees that had their tops blown out in winter storms. They were nearby and were scheduled to be harvested.
The stock he sent were 1/4″ thick by at least 4″ wide and up to 12 feet long. Since Josh had been involved in building guideboats he knew how much stock to send.
Here is an edge view of the quarter sawn stock.
Quarter sawn edge view
Note that the grain is not perpendicular to the top and bottom surfaces. This would be the case with truly quarter sawn stock. The grain in this stock lies at an angle to the surfaces. This is called riff cut and was preferred by the old timer boat builders.
Next time I will introduce someone who will help me build this boat. We will start to assemble the boat piece by piece.
Many years ago my Uncle Don called me. He asked if we could put him up overnight on his way to Mystic Seaport Museum. We were living in Mahwah, NJ. about half way between where he was living in St. Michaels, MD and Mystic, CN. It seems he was bringing a boat he and his boat building friends were donating to the Seaport Museum.
While he was with us I learned little about the boat he was donating; only that it was called a Whitehall and that it had a history that went back to the early days of our country.
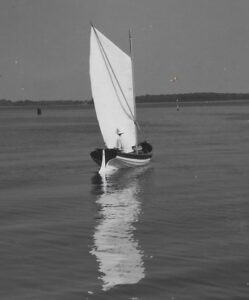
Here is Uncle Don in the Whitehall.
Uncle Don in his Whitehall destined for Mystic Seaport Museum.
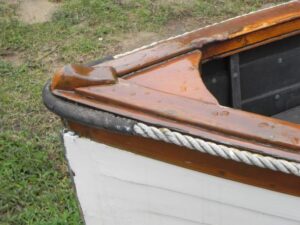
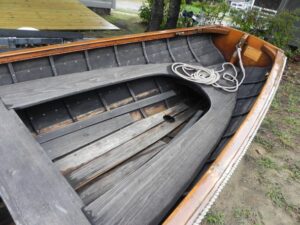
The White hall has stunning lines. Its planking is lapstrake and it sports a wineglass transom. Uncle Don is sailing it but it is more commonly rowed.
There is some uncertainty regarding the name “Whitehall”. Wikipedia claims it came from Whitehall street in Lower Manhattan. Lower Manhattan was long a hub for shipping, dating back to pre-revolutionary days. A small craft like the Whitehall would be indispensable for ferrying personnel and supplies between tall ships and the shore.
Somehow this origin story for the Whitehall did not ring true for me. Whitehall street was a hub of commerce but not a hub for building ships. I asked my son Stew where he thought the name Whitehall originated. Stew had built a Whitehall (more about that below} so I thought he might know. He said “Dad, I think the name came from a town called Whitehall near Lake Champaign in Vermont.” So I googled Whitehall, NY and hit pay dirt. Under what is Whitehall Famous for it ? says “Because of Revolutionary War actions the New York Legislature in 1960 declared the legacy that names Whitehall, N.Y. the Birthplace of the United States Navy. So a navy needs lots of support including ship wrights and carpenters as well as materials such as tall pine and spruce trees. This source of timber was readily available from the nearby Adirondack Mountains of New York and the Green Mountains of Vermont.
A small boat to move people and ship’s stores about would be essential to a shipping hub. So a small row boat 16 to 20 feet long evolved to fill the need. But why a sail? Well it seems the now famous Whitehall became a requirement of other large ports in the northeast U.S. Ship chandlers, who serviced the tall ships coming into Boston used them to intercept a Clipper to secure their business. As soon as a tall ship’s sails appeared on the horizon a Whitehall would hoist its sail and head for it. Most would leave Boston Harbor but some were stationed in Provincetown to ensure that they got to their potential customer first. I’ll bet they brought along some enticement to make a deal, like Mum’s pies, not seen for many months at sea by the ship’s crew. The Whitehall is a rugged craft that could take on rough seas often encountered off Cape Cod.
But the story doesn’t end here. My son Stew decided to build a Whitehall many years after Uncle Don donated his Whitehall. Here is Stew’s Whitehall.
Son Stew’s Whitehall
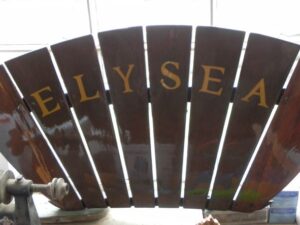
Some time afterwards, Stew, his wife and two small kids visited Mystic Seaport Museum. After spending most of the day touring the large campus the kids were tired and nagging to go home. But Stew had been urged to go to the boat livery and take out a small boat. So on a whim he went to the livery. A very lively woman asked what sort of boat he would like to take out for a row. Stew said “By the way, My Uncle donated a boat to the Museum some years ago. Would know anything about it? ” What was his name” the woman replied. “Dr. Donald Fisher” said Stew. “Oh, the Elysea. It is right here. It is one of our favorites. It goes out almost everyday. It never gives us a problem.” she replied.
So fast forward to now. Last fall my wife Fran and I visited Mystic Seaport Museum. I was intent on finding Elysea. Was she still around? After all she had been a part of the Museum for over 40 years.
The guides at Mystic are most friendly and helpful. I corralled one of then, a woman named Margaret, and told her of my search for Elysea. She said we should go and search around the livery and the pier. So off we went but no luck. No Elysea. My heart sank! What could have happened to Elysea?
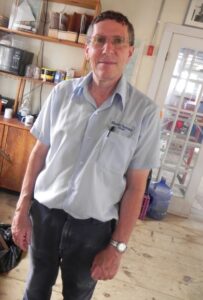
Then Margaret said we should check with Trevor. Trevor is a shipwright at Mystic and does restorations of their small craft. We found Trevor in the livery barn at work on a restoration.
Trevor
We asked Trevor if he knew the where abouts of Elysea. “Oh, sure” he said, “She’s right outside on a trailer. She’s due for a thorough refurbishing after I finish this boat.”
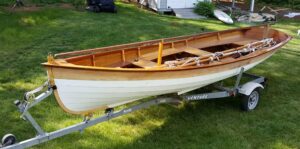
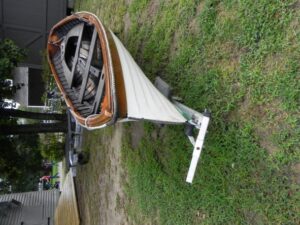
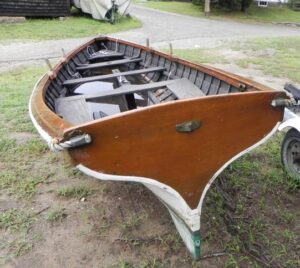
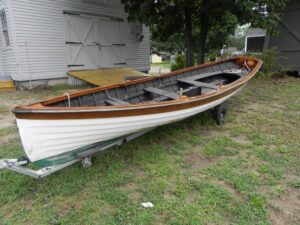
Sure enough, there she was.
Elysea on her trailer.
Here are other views of her.
Stern view of Elysea. Elysea-side view.
Bow view of Elysea.
Elysea-stern view.Seat back.
We left Mystic feeling happy and satisfied that a Fisher family legacy was intact and will provide many happy times for Museum visitors in the years to come. We were invited back for the relaunch of Elysea next spring. We’ll be there!
An afterword: According to the internet the name Elysea is of Greek origin and means “blissful, noble, and honorable.”