In an earlier blog I told how I found my way back to building yet another guideboat. This time around I would use the same materials that the old master builders used. There was one exception. I would use hackmatack roots for the ribs and stems. The old timers would have used red spruce which is no longer available. But this substitution should make no difference.
Much to my surprise and delight I found someone who was eager to join the enterprise of building a guideboat. He is my brother -in-law Stew. Stew is an extremely creative soul. He has great nostalgia for things of the past. He loves old cars and has restored several. He collects things from past years that seem, to others, as outlandish. They include a wooden telephone booth, juke boxes(3), and an Atlantic City wheeled boardwalk stroller.
As I have gone along with this build I have learned new things about building this beautiful boat. They have come to me quite unexpectedly,
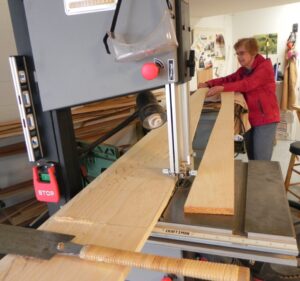
So let’s get started. We’ll need to start assembling the various critical parts of a guideboat. We will start with the bottom board. I was fortunate to get enough grade A eastern white pine stock wide enough for making the bottom board. Since it was too short to make the whole board, I would have to scarf it. I’ve done that before so it’s not a problem. Using a template I laid out the board on my new stock. Then off to the bandsaw with my able assistant, my wife Fran. Here we are at the bandsaw.
Next the midship ends of the board are beveled to make the scarf.
I have put the two previously sawn planks on top of one another and offset them by the width of the scarf (a rule of thumb for making a scarf is to make its width six times the thickness of the stock). By setting it up this way I can plane the two planks at once. If I do it right the two sections should fit nicely together. (PS Be sure to allow the thickness of the scarf in laying out the length of the bottom board. If you don’t you will come up short)
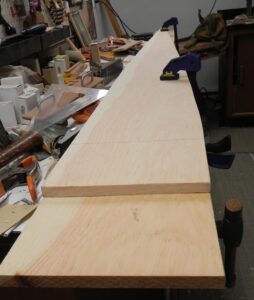
I used recorcinal glue to bond the two sections. In order for the planking to have a smooth transition from the bottom board to the ribs the bottom board must have a “rolling ” bevel. I use a template to trace the upper edge of the bottom board.
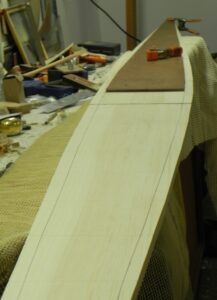
You can do the same thing by clamping a small, straight piece of wood to the foot end of a rib. Extend it a few inches from the foot end. Now place the rib with the clamped jig up against the bottom board at a rib station. It should be snug against the underside of the board. There will be a gap where the rib extension does not meet the bottom board. Measure that gap and mark it on the upside of the board. Do that for each rib station. Connect these “dots” with a batten. This line delineates the waste that must be removed to produce a smooth transition between the bottom board and the rib.
Now we can star putting the pieces together. The bottom board is slung on a hanger on each end of the strong back. To have the bottom board hung vertically makes it easy to attach the ribs.
Now the ribs are attached. Here they are on a rack ready to hang. The rib patterns are in the lead on the rack. I find that storing the ribs on a rack like this makes the whole assembly process easier.
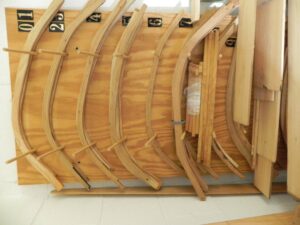
Here, the ribs have been attached to the bottom board.
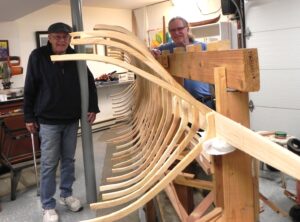
Now the assembly is turned upside down and mounted on the strong back.
As you can see from the photos above the strong back is fitted with a special beam. It has slots to give clearance for the ribs. It is also bent down slightly at each end to apply “rocker” to the hull. This slight curve at each end of the hull makes the boat more maneuverable.
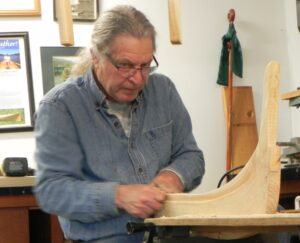
Next comes the stems, Before they are installed a rabbet must be hewn to enable the plank (hood) ends to fit flush into the the stem. For the most part it meets the stem at a low angle and must be as deep as the plank thickness.
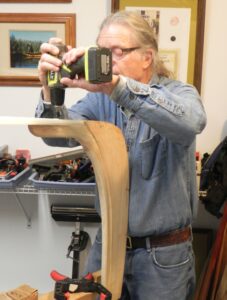
Here is Stew creating the rabbet on one of the the stems. He uses a chisel to do the rough cutting and cabinet scraper to finish up. A notch is cut in the aft end of the stem to receive the bottom board.
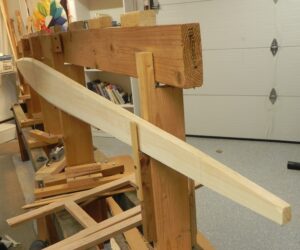
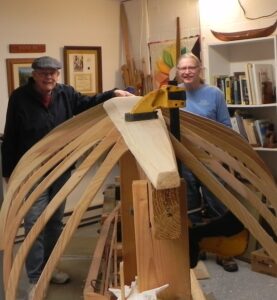
The stems are now ready to be attached to the bottom board.
The next steps are important to a proper build. The bottom board must be level and the stems perpendicular to it. Place a carpenter’s level crosswise on the bottom board at the midships. If it is necessary to level the bottom board put shims under the strong back legs. Now put the level up against each of the stems. You may have to use shims to make the stems perpendicular to the bottom board. As the old timers put it we are now level and plumb.
In the next post we will prepare the nascent hull for planking.