It never occurred to me until now. A nascent guideboat does not start to exist until she comes off the builder’s jig. So today will be the day she is born.
So, what about launch day? What would you call that? I would liken that to a debutante at her coming out party.
Let’s have another look at her on the builder’s jig.
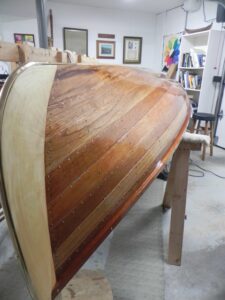
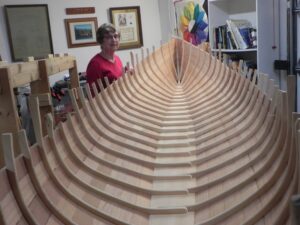
The reason that releasing the hull from the jig is so important to me is that I have never seen the inside of the hull. I have been fretting over this moment. How have I done on the inside? Will I be disappointed?Well here is my wife Fran standing next to her after pulling her off the jig.
A cursory inspection reveals that all is well. Not a bad job at all.
At the Adirondack Museum, Carl Hathaway narrates a video of Willard Hanmer building a guideboat. Having been a docent in the boat shop while Allison builds guideboats for many years, I have heard Carl’s narration a hundred times if not more. When Willard takes his boat off the jig, Carl intones”the boat is about half done”. Really, I think. I have spent what seems to be an eternity in getting this far only to learn I am only half done. But, you know, I think he is right.
So let’s get after it. The first thing is to cut of the rib ends that are so conspicuous. I use a Japanese flush cut saw for that duty.
The next task is to clean up the planking to rid it off bedding compound and to make sure the planking feather edge is finished off. I use a cabinet scraper with a curved profile to do that. There is also work to be done along the shear line. The shear plank does not always line up with the gunwale. In fact, I purposely left the planking just even or slightly above the gunwale.
Here are the tools to render the planking flush with the gunwale.
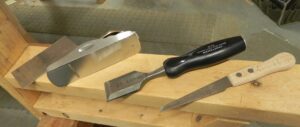
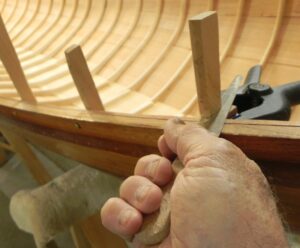
Now there are about 2500 brass screws in a guideboat and 4000 copper tacks. It is time now to add more tacks. We need to drive tacks from inside the hull and clinch them to help seal the feather edge joinery of the planking. Here are the tools for doing that.
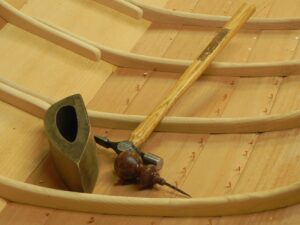
The awl is used to set a pilot hole for each tack. The tacks must be “stuck” in each hole. This is a tedious task and one not meant for someone with large fingers like mine.
When I was a docent in the boat shop at the Adirondack Museum I used to tell this story to the kids who cane to watch Allison build a guideboat. I would say “Suppose you lived in the Adirondacks in the 1870’s and your father was a guideboat builder. He would pay you to stick tacks in the holes he had punched for them with his awl. He would pay you a nickel for each round of planking. Now, there are eight rounds of planking so how much would you make?”
I got help sticking tacks when building my second guideboat from my granddaughter Haley. Her photo sticking tacks is on the title page of my book Tale of an Historic Guideboat and How to Build One.
Here is a line of stuck tacks.
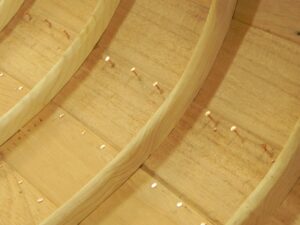
A line of stuck tacks.
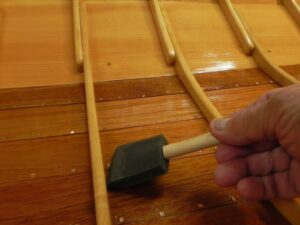
Finally it is time for varnishing the inside of the hull. This is where Epifanes Woodfinish Gloss marine spar varnish saves tons of work. If you apply subsequent coats of this varnish within 72 hours you need not sand between coats. You can image sanding each space between ribs (or bay). That is a awful lot of tedious work that this varnish eliminates. Here I’m applying varnish with a foam brush.
Next time we turn our attention to the decks. They are a signature that each builder can incorporate in his boat.